Getting Started with AE Sheets: Fast Localization for After Effects
Learn the core AE Sheets workflow for indexing layers, creating language versions, and generating localized compositions.
Hugo
· 4 min read
Localizing a video project in After Effects the traditional way means opening every composition, finding every text layer, and changing it by hand. If you have ten language versions, you do it ten times.
AE Sheets solves this with an indexed-layer workflow inside After Effects. You index the layers you want to manage, create language versions, and generate localized comps in one run.
This guide walks you through the full workflow from scratch.
What you’ll need
- Adobe After Effects 2024 or newer
- AE Sheets installed (download from aescripts and install via ZXP Installer)
- Optional: a Google Gemini or OpenAI API key if you want AI auto-translation
Step 1: Set up your composition
Start with a simple comp — a title card with a few text layers works perfectly for your first test.
Before translating, it is worth using AE Sheets rigging tools (like Auto Resize, Dynamic Anchor, or Pinning) so layouts survive longer or shorter translated strings.
Step 2: Open AE Sheets and index your layers
- In After Effects, go to Window → Extensions → AE Sheets.
- In the Layers Panel, select the text layers you want to manage.
- Click Add Layer to index them.
Each indexed row gets a unique ID (for example #1, #2). AE Sheets tracks layers by this index, not by matching layer-name text.
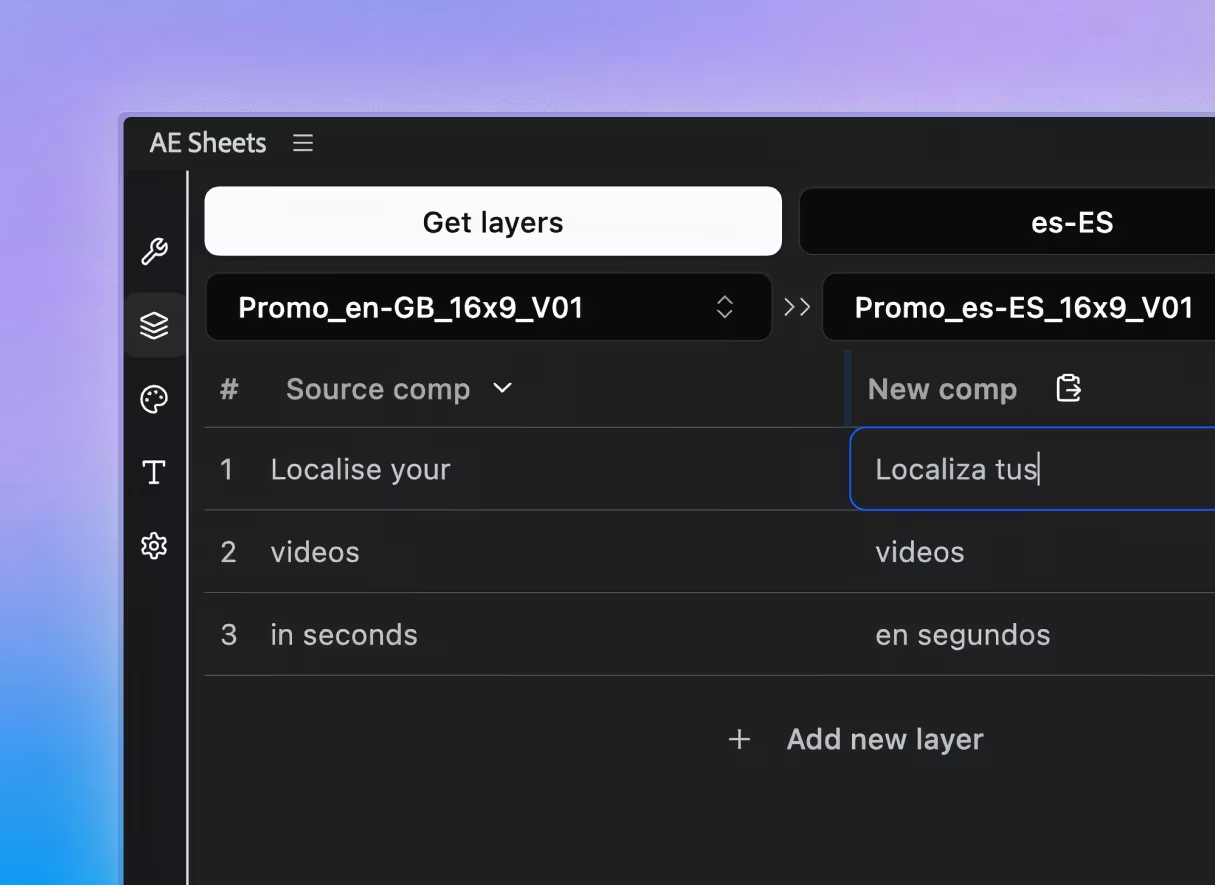
Step 3: Create a version and add translations
Click Create Version, pick a language preset, and AE Sheets adds a new version column (for example fr-FR or de-DE).
From there you can fill translations in a few ways:
- Type directly into the version column.
- Export/import TSV.
- Copy/paste to and from Google Sheets or Excel.
- Use AI auto-translation (if your API key is configured in Settings).
Example version table:
| Index | English (source) | French | German |
|---|---|---|---|
| #1 | Welcome back | Bon retour | Willkommen |
| #2 | Sign in below | Connectez-vous | Melden Sie an |
| #3 | Get started | Commencer | Loslegen |
AE Sheets supports TSV workflows (not CSV) for spreadsheet import/export.
Step 4: Apply your translations
When your version column is ready, click Run in the Layers Panel. AE Sheets will:
- Duplicate your master composition.
- Rename output comps based on version settings.
- Apply translated text (and comp swaps for comp-type rows, if used).
- Apply preset and font-map settings for that version.
Your original composition stays untouched.
Step 5: Version your output
AE Sheets handles localization/version generation; rendering still happens through your normal After Effects render workflow. Once comps are generated, you can:
- Render all language variants from a single After Effects project.
- Use Batch Create to prepare many language columns before running generation.
- Keep translation history in TSV files or external spreadsheets.
Common pitfalls to avoid
Layers are not indexed yet. AE Sheets only manages rows that have an index. If nothing updates, make sure those layers were added with Add Layer (or manually prefixed and then imported with Get Layers).
Mixed index types. Do not reuse one index for both text and comp-type rows. Keep index IDs unique per row type.
Fonts aren’t installed for target scripts. If you’re localizing into Arabic, CJK, or other scripts, install compatible fonts and configure presets/font mapping before running generation.
What to do next
Once you’re comfortable with the basics, explore:
- Conditional formatting in your sheet to flag untranslated rows.
- Auto-translation with Gemini or OpenAI (bring your own API key).
- Shared sheets so your client or translator can update the spreadsheet directly without touching After Effects.
If you run into anything, check out the Help Center or reach out via Discord — the community is quick to respond.
Ready to get AE Sheets? Learn more and buy →
Mentioned in this article
Take your workflow further
The tools covered in this guide are available on Sidequest Plugins.